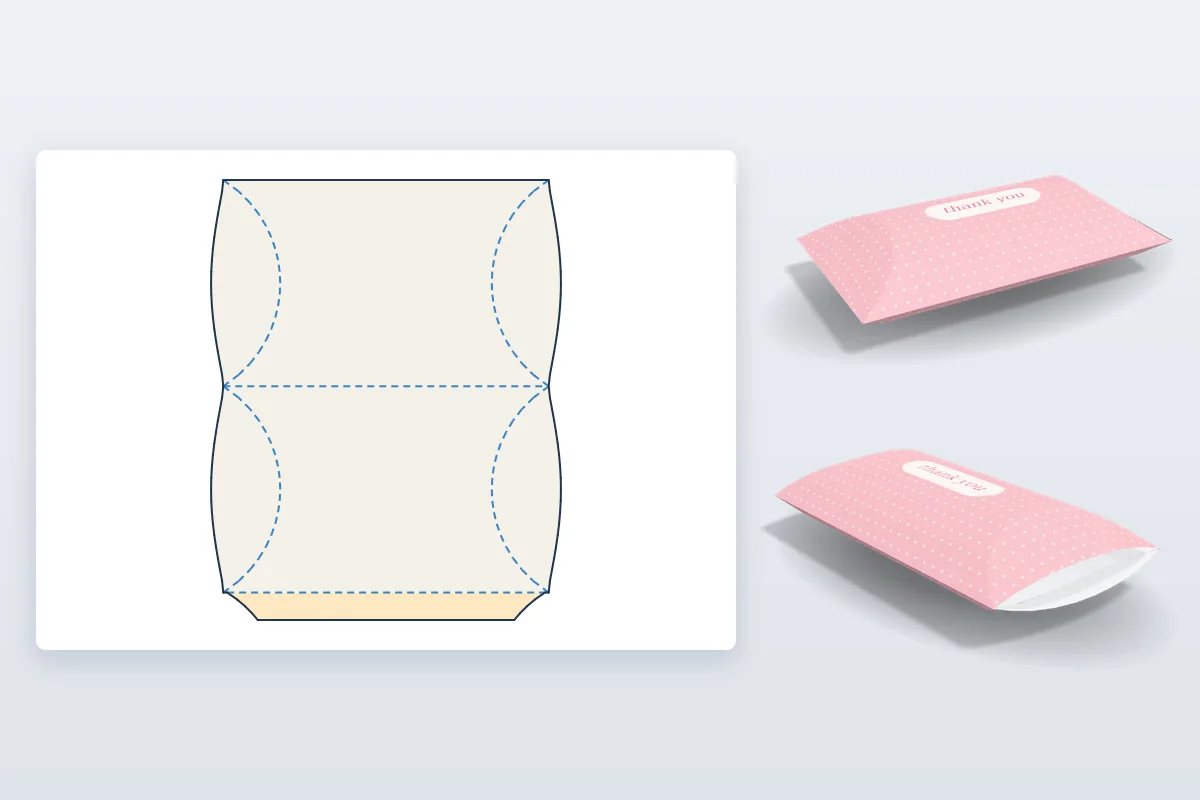
A pillow box is the little curved box that gift cards, jewellery, favours and samples so often come in. It looks premium, uses very little board, ships flat and closes without glue or tucks. The secret is in its creases: instead of straight folds, each end has a curved crease, and pushing the ends in makes the whole box bow into its pillow shape.
This guide explains how a pillow box works, how to choose its size, and how to make the dieline in your own size with the free pillow box template, then design it and watch it close in 3D.
How a pillow box works
The whole box is one piece of board with two faces sharing a straight crease, a glue flap along the far edge and a curved crease at each end of both faces. Beyond each crease is a curved end flap.
- The glue flap is stuck inside the far edge of the other face, which turns the sheet into a flat tube with a sharp fold at each side.
- Squeeze the two side folds towards each other and the faces bow out into a lens shape, like a pillow seen end on.
- At each end, push the curved flaps in. Because the creases are curved, the flaps cannot fold flat: they curl in and meet each other in the middle of the end, pinching it closed.
- The bowed faces hold the end flaps in place, so the box stays closed but can be opened again by pressing the ends out.
Choosing the size
- Width: the closed pillow from tip to tip. The middle third of it is where the product sits comfortably, because the pillow tapers towards its ends.
- Depth: the width across the pillow, from one side fold to the other.
- Height: how thick the pillow is in the middle. Keep it to no more than about two thirds of the depth; a pillow that is too thick for its width cannot close.
- Board: folding carton board around 0.3 to 0.5 mm. Thin board bends smoothly and its curved creases fold cleanly.
- All three are outside sizes of the closed box, unlike most carton templates, because a pillow has no flat inside walls to measure.
As a starting point: a gift card fits a slim pillow about 120 × 20 × 80 mm, a necklace or bracelet 100 × 30 × 60 mm, and soap or sweets 90 × 35 × 70 mm. The template page has these as presets.
Make the pillow box dieline in your size
- Open the pillow box template and pick a preset or type the width, height and depth in millimetres or inches. The dieline redraws as you type.
- Open it in the Studio and set the board thickness. Each face is cut as wide as its curve across the closed box, and each end flap as deep as it needs to be to reach the middle of the closed end.
- Place artwork on the front, the back and the four end flaps. The end flaps show on the closed box, so give them a colour or pattern too.
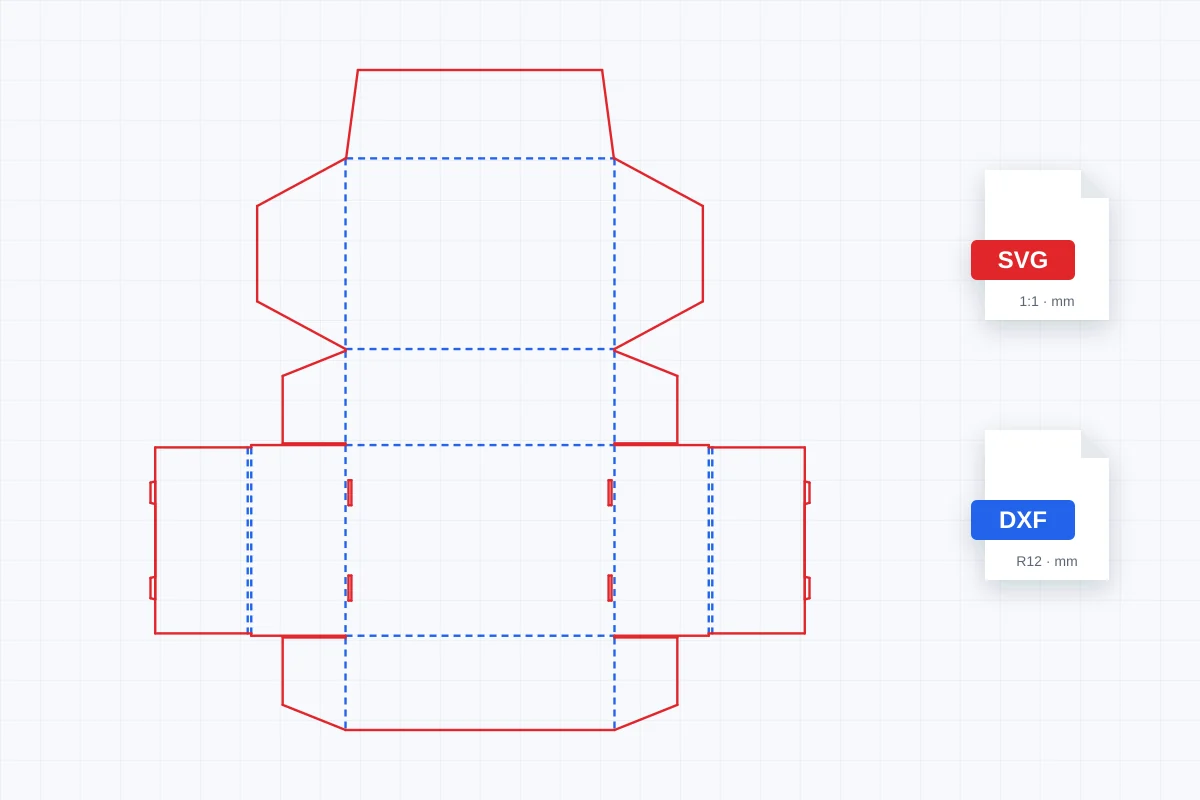
- Fold it in 3D to check the design on the curved faces and the closed ends, then export a 1:1 PDF, or the cutting template as SVG or DXF.
Folding it by hand
- Cut along the solid lines and score the dashed lines. Score the curved creases cleanly and evenly: they are what make the box work, and a weak curved score makes the ends crumple instead of curling.
- Pre-fold the straight crease between the two faces, then crease each curved score gently, a little at a time, curling the flap towards the inside.
- Glue the glue flap inside the free edge of the front face and let it dry flat.
- Squeeze the sides so the faces bow out, push one end closed, fill the box, and push the other end closed.
Designing for a pillow box
- Put the logo or message in the middle of the front face. The ends curve away, so text near them is hard to read on the closed box.
- Run backgrounds and patterns right across the faces and onto the end flaps, so the closed ends match the faces.
- Keep small text a few millimetres away from the curved creases, where the board bends most.
- The glue flap is hidden inside the front face; leave it free of ink and varnish so the glue holds.
- Preview the design in 3D: a pattern or line that looks straight on the flat sheet curves over the bowed face.
Before production
The template is drawn from your size and board thickness, which is what you need for design, proofs, samples and quotes. Curved scores depend on the board and the scoring rule, so for a production run send your printer the size and the cutting template, and ask them to confirm the curved creases and the final die.
What is a pillow box?
A small carton with two bowed faces and curved ends, shaped like a pillow. It is cut from one piece of board, glued once along its side, and closed by pushing in its curved end flaps, with no tuck or glue at the ends.
Is there a free pillow box template?
Yes. The pillow box template in 3D Box Studio is free. Enter the width, depth and height of the closed pillow and it draws the dieline with the curved creases, end flaps and glue flap, and shows the box closing in 3D. Designing and exporting need a free account.
What size should a pillow box be?
Measure your product and leave room: the pillow is thickest in the middle and tapers to its ends, so the product should sit in the middle third of the length. Keep the height to no more than about two thirds of the width across, or the faces cannot bow enough to close.
What board is best for pillow boxes?
Folding carton board around 0.3 to 0.5 mm thick. Thin board bends smoothly into the pillow shape and its curved creases fold cleanly; thick board and corrugated crack along the curves.
Can I download the pillow box dieline?
Yes. Export a 1:1 PDF with your artwork, bleed and cut and crease lines, or the cutting template on its own as SVG or DXF for a die maker, cutting table, Cricut or laser cutter.